First of all, setup your AWS account – and login into AWS Management Console. Then create any bucket you want.
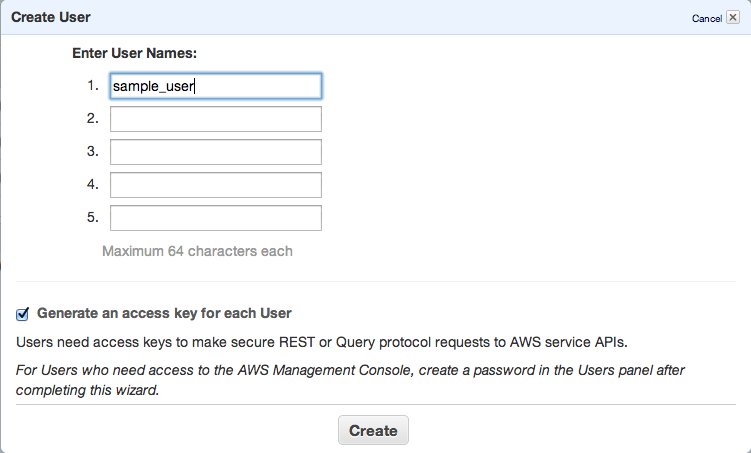
Next step is to add new IAM user – go to https://console.aws.amazon.com/iam/home?#users, select Users and click Create new user button.
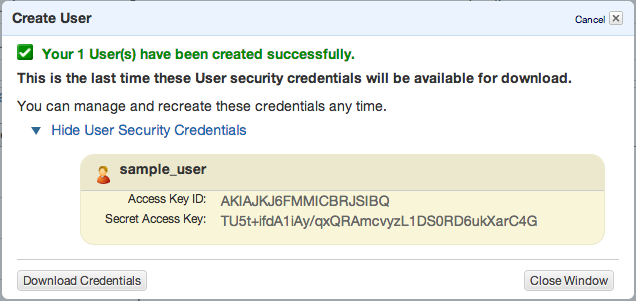
Click Create and copy/paste or download your access keys.
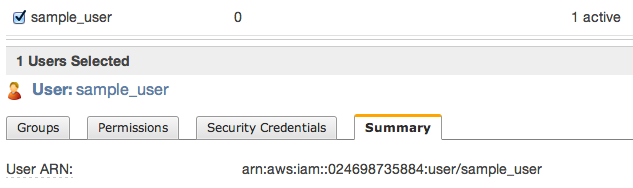
Then close window and click to summary tab – you’ll need to copy ARN notation of this user
s3cmd
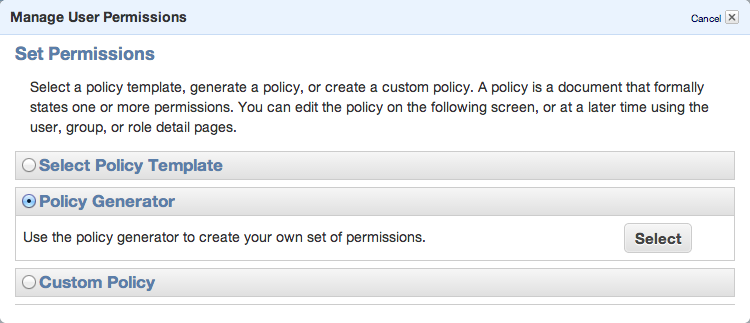
To be able to sync some folders and/or use s3cmd commandline tool, you need to setup some more policies. Click Permission tab and then Attach User Policy. Then choose Policy Generator and follow these steps:
 Set permissions as shown in following image – we need ListAllMyBuckets for :::* and ListBucket and PutObject for the one, specified bucket.
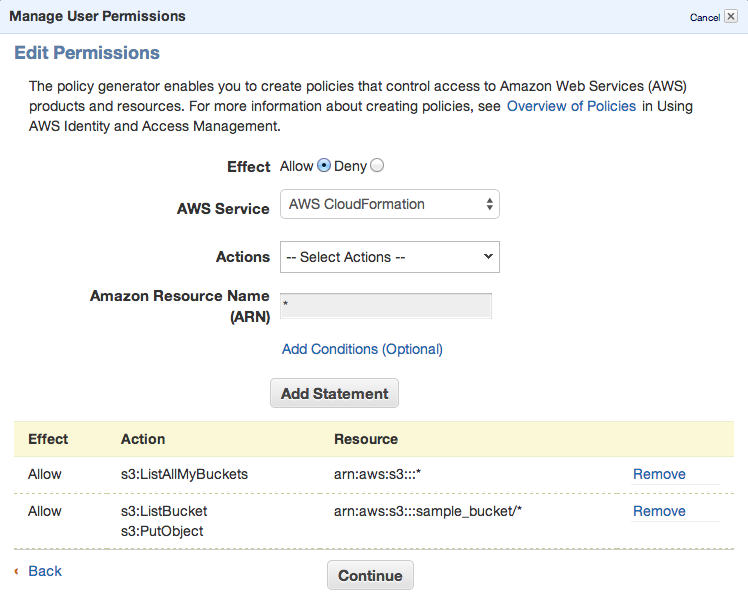
Click Continue and save new policy
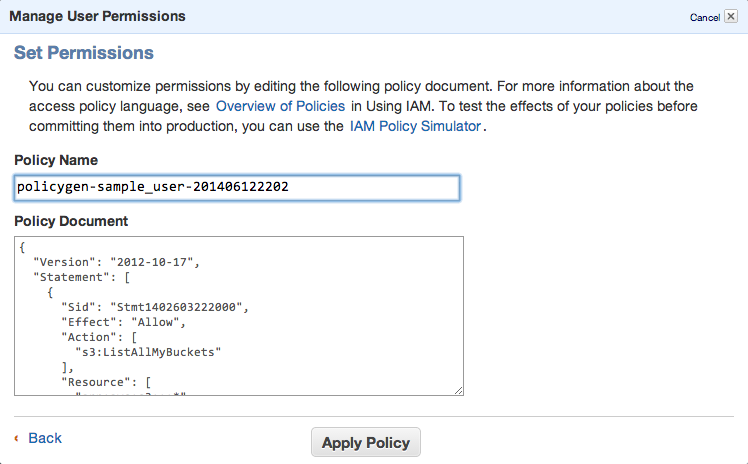
You can always edit the policy using Manage Policy. You should create this kind of policy file:
{
  "Version": "2012-10-17",
  "Statement": [
    {
      "Sid": "Stmt1402603222000",
      "Effect": "Allow",
      "Action": [
        "s3:ListAllMyBuckets"
      ],
      "Resource": [
        "arn:aws:s3:::*"
      ]
    },
    {
      "Sid": "Stmt1402603306000",
      "Effect": "Allow",
      "Action": [
        "s3:ListBucket",
        "s3:PutObject"
      ],
      "Resource": [
        "arn:aws:s3:::sample_bucket/*"
      ]
    }
  ]
}
That’s all. Lets move to bucket policy.
Bucket policy
Now you can open Policy Generator – http://awspolicygen.s3.amazonaws.com/policygen.html and start adding new items.
First of all, select your policy type – S3

and then fill new policy – we need two policies – one for all users to read objects (GetObject) and second for your new user, to be able to upload, delete and get object as well.
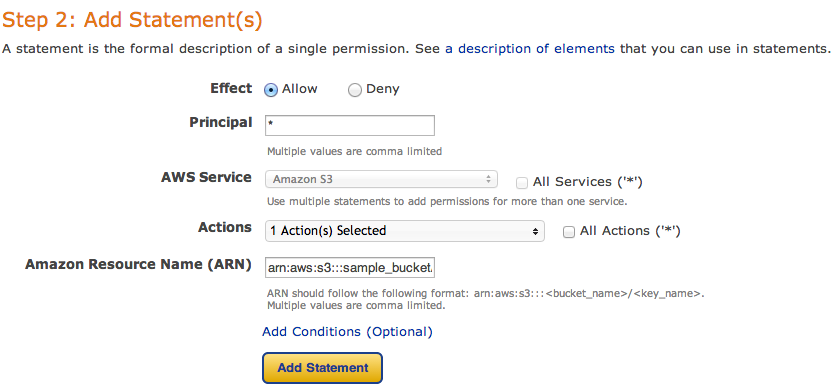
and click Add Statement. The list below the form should look like

So, add your user the same way. As principal add your ARN notation (which you copied before) and add Actions as shown below.

All set. You need to click Generate Policy button and copy freshly generated JSON policy to your clipboard
{
  "Id": "Policy1402594421281",
  "Statement": [
    {
      "Sid": "Stmt1402593998750",
      "Action": [
        "s3:GetObject"
      ],
      "Effect": "Allow",
      "Resource": "arn:aws:s3:::sample_bucket/*",
      "Principal": {
        "AWS": [
          "*"
        ]
      }
    },
    {
      "Sid": "Stmt1402594323930",
      "Action": [
        "s3:AbortMultipartUpload",
        "s3:DeleteObject",
        "s3:GetObject",
        "s3:GetObjectAcl",
        "s3:PutObject",
        "s3:PutObjectAcl"
      ],
      "Effect": "Allow",
      "Resource": "arn:aws:s3:::sample_bucket/*",
      "Principal": {
        "AWS": [
          "arn:aws:iam::024698735884:user/sample_user"
        ]
      }
    }
  ]
}
Last step is to add this policy to the bucket. Go back to your S3 console (https://console.aws.amazon.com/s3/home), click loupe icon next to bucket name and open Permission section. Click on Edit Bucket Policy and paste the generated policy into that window. Save and you’re done.

You’ll need API keys for use with Paperclip or any other S3 storage engine, so keep them safe.
PS: when you plan to use s3 as storage for your static files, avoid using underscore in your bucket name – as it does not comply with valid FQDN. ‘sample_bucket’ was used only as an example, in the real word you should use ‘sample-bucket’.